Build Your First Agent
Let's create your first custom agent in under 5 minutes.
We'll build a Market Research Assistant that can analyze competitors, research trends, and generate actionable insights.
- CLI
- WebUI
Step 1: Create Your Agent
Create a new directory and add a basic configuration:
mkdir market-research-assistant
cd market-research-assistant
Create a market-research-assistant.yml file with your preferred LLM provider:
- OpenAI
- Anthropic
- Groq
- xAI
- Cohere
# market-research-assistant.yml
systemPrompt: |
  You are a Market Research Assistant specializing in competitive analysis and market intelligence.

  Your expertise includes:
  - Analyzing competitor strategies and positioning
  - Identifying market trends and opportunities
  - Researching customer pain points and needs
  - Generating actionable business insights

  Always provide data-driven insights with specific recommendations.

llm:
  provider: openai
  model: gpt-5-mini
  apiKey: $OPENAI_API_KEY
# market-research-assistant.yml
systemPrompt: |
  You are a Market Research Assistant specializing in competitive analysis and market intelligence.

  Your expertise includes:
  - Analyzing competitor strategies and positioning
  - Identifying market trends and opportunities
  - Researching customer pain points and needs
  - Generating actionable business insights

  Always provide data-driven insights with specific recommendations.

llm:
  provider: anthropic
  model: claude-sonnet-4-5-20250929
  apiKey: $ANTHROPIC_API_KEY
# market-research-assistant.yml
systemPrompt: |
  You are a Market Research Assistant specializing in competitive analysis and market intelligence.

  Your expertise includes:
  - Analyzing competitor strategies and positioning
  - Identifying market trends and opportunities
  - Researching customer pain points and needs
  - Generating actionable business insights

  Always provide data-driven insights with specific recommendations.

llm:
  provider: google
  model: gemini-2.5-pro
  apiKey: $GOOGLE_GENERATIVE_AI_API_KEY
# market-research-assistant.yml
systemPrompt: |
  You are a Market Research Assistant specializing in competitive analysis and market intelligence.

  Your expertise includes:
  - Analyzing competitor strategies and positioning
  - Identifying market trends and opportunities
  - Researching customer pain points and needs
  - Generating actionable business insights

  Always provide data-driven insights with specific recommendations.

llm:
  provider: groq
  model: llama-3.3-70b-versatile
  apiKey: $GROQ_API_KEY
# market-research-assistant.yml
systemPrompt: |
  You are a Market Research Assistant specializing in competitive analysis and market intelligence.

  Your expertise includes:
  - Analyzing competitor strategies and positioning
  - Identifying market trends and opportunities
  - Researching customer pain points and needs
  - Generating actionable business insights

  Always provide data-driven insights with specific recommendations.

llm:
  provider: xai
  model: grok-4
  apiKey: $XAI_API_KEY
# market-research-assistant.yml
systemPrompt: |
  You are a Market Research Assistant specializing in competitive analysis and market intelligence.

  Your expertise includes:
  - Analyzing competitor strategies and positioning
  - Identifying market trends and opportunities
  - Researching customer pain points and needs
  - Generating actionable business insights

  Always provide data-driven insights with specific recommendations.

llm:
  provider: cohere
  model: command-a-03-2025
  apiKey: $COHERE_API_KEY
Step 2: Add Research Tools
Add Exa's AI-powered web search capabilities to your agent:
# market-research-assistant.yml
systemPrompt: |
  You are a Market Research Assistant specializing in competitive analysis and market intelligence.

  Your expertise includes:
  - Analyzing competitor strategies and positioning
  - Identifying market trends and opportunities
  - Researching customer pain points and needs
  - Generating actionable business insights

  Always provide data-driven insights with specific recommendations.

llm:
  provider: openai
  model: gpt-5-mini
  apiKey: $OPENAI_API_KEY

mcpServers:
  # AI-powered web search for market research
  exa:
    type: http
    url: https://mcp.exa.ai/mcp
Step 3: Test Your Agent
Run your agent with a practical market research task:
dexto --agent market-research-assistant.yml
This opens the web UI.
Then ask the agent this:
Research the AI coding assistant market. Analyze the top 3 competitors, their pricing strategies, and identify opportunities for a new entrant
Your agent will:
- 🔍 Use AI-powered search to find relevant companies and data
- 📊 Analyze competitor strategies and market positioning
- 📝 Generate a comprehensive market analysis report
- 💡 Provide actionable recommendations
For terminal-based interaction, add --mode cli: dexto --agent market-research-assistant.yml --mode cli
Try These Research Tasks
Once your agent is running, try these powerful research scenarios:
- "Analyze how Notion, Obsidian, and Roam Research position themselves in the note-taking market."
- "Research the sustainable packaging industry and identify customer pain points."
- "Find emerging trends in remote work tools and 5 companies launched in 2024."
- "Research successful SaaS product launches and their marketing strategies."
Step 1: Create a New Agent
First, start the Dexto Web UI:
dexto
Click on the Agent Selector button (with the sparkle icon) at the top of the page, then click New Agent.
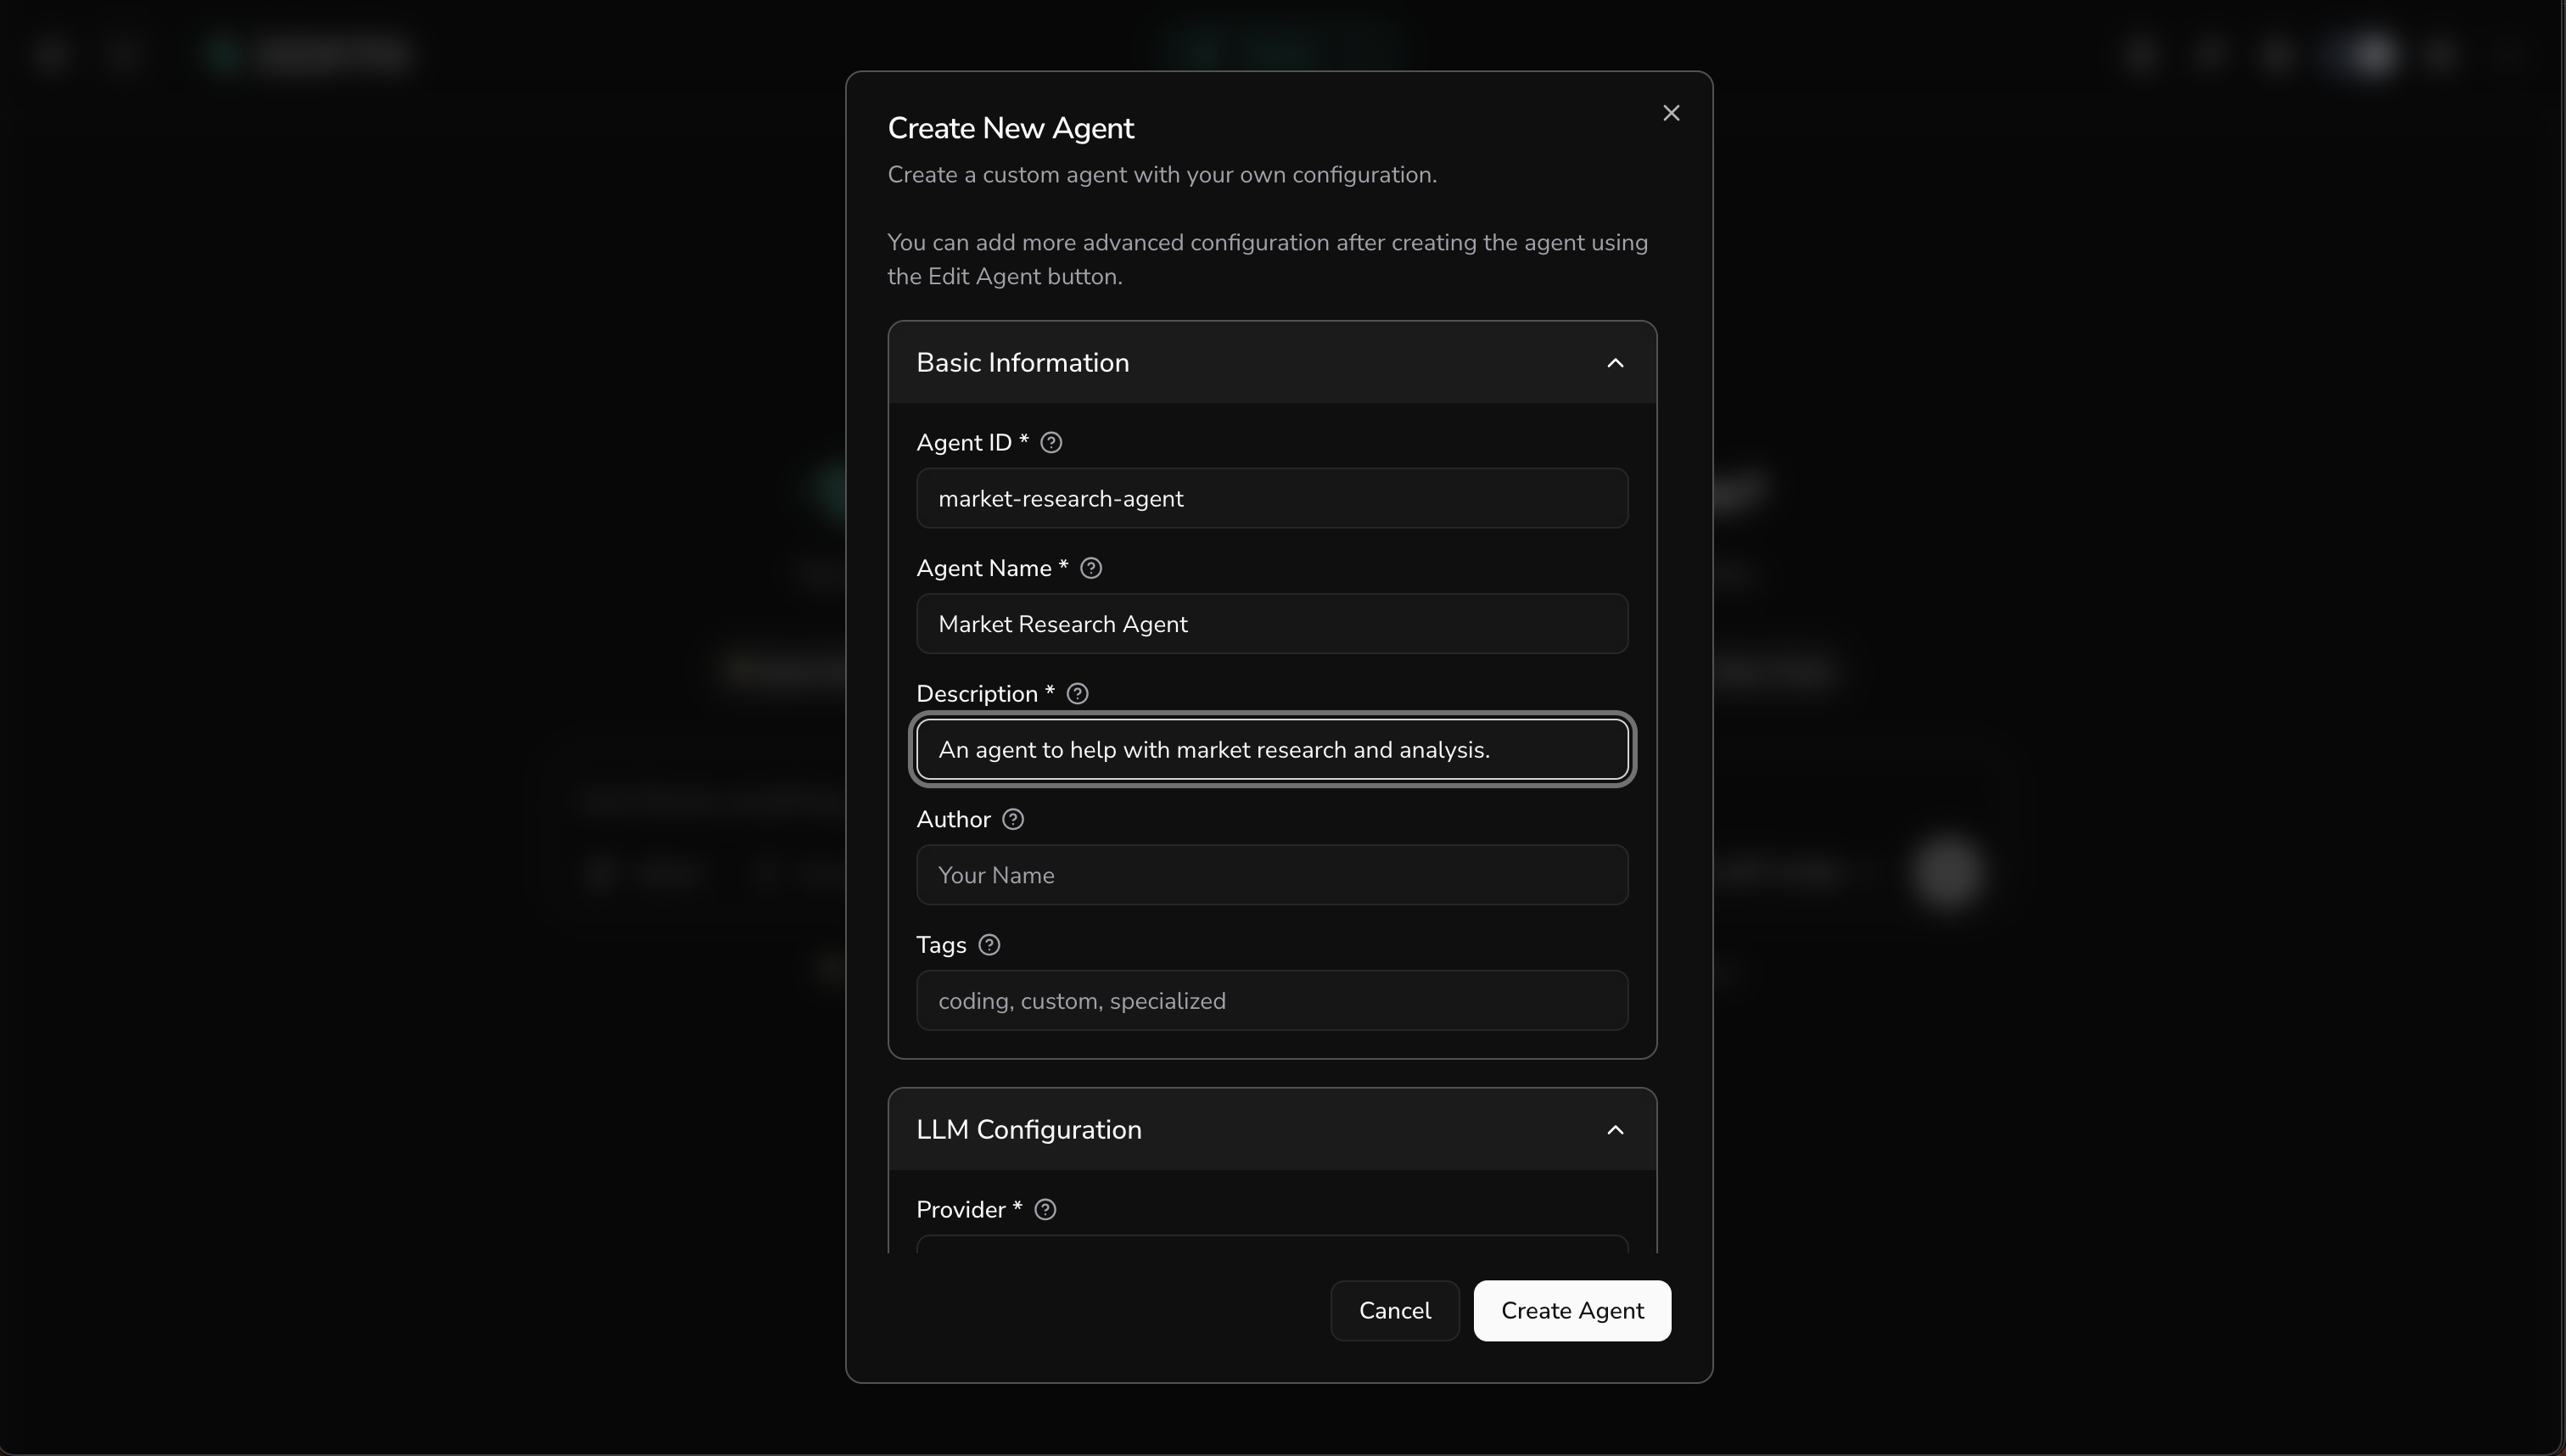
This opens the agent creation modal where you can configure your agent. Fill in the basic information:
- Agent ID:
market-research-agent - Agent Name:
Market Research Agent - Description:
An agent to help with market research and analysis. - Tags:
coding, custom, specialized
Step 2: Configure the LLM
Choose your LLM provider and model. Select the same one you picked when you set up Dexto.
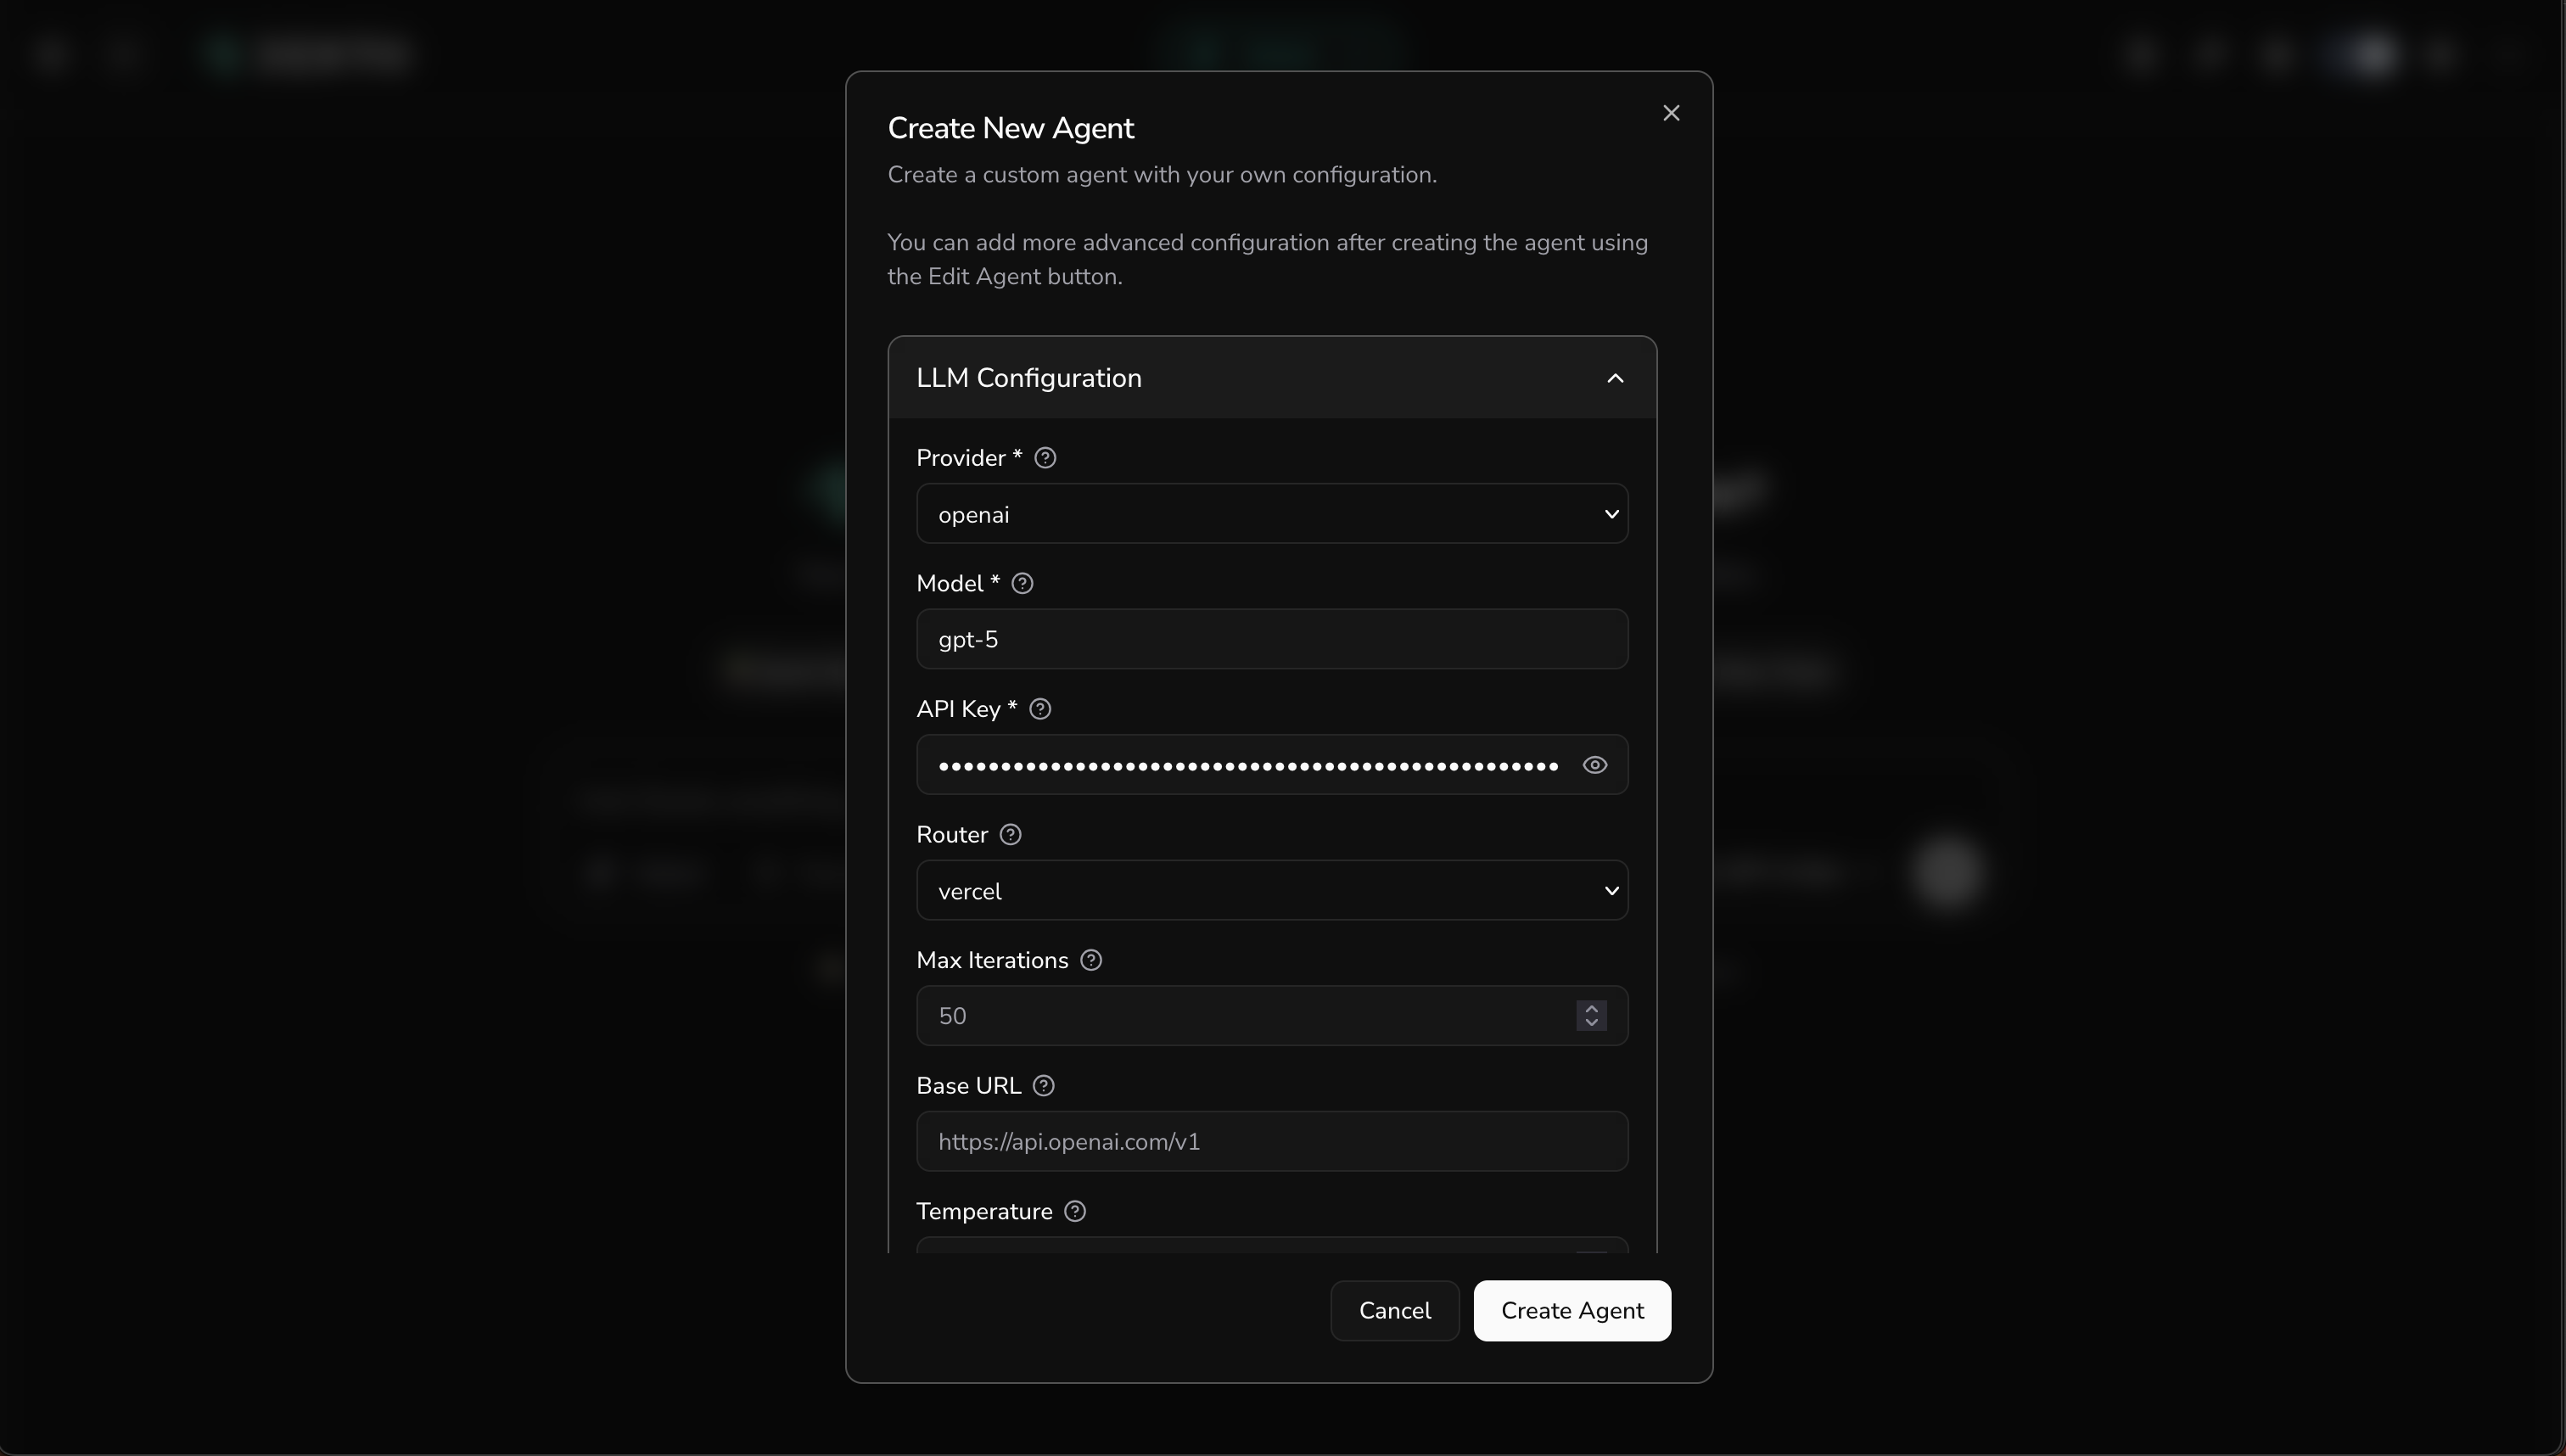
The available providers include:
- OpenAI (e.g., gpt-5-mini)
- Anthropic (e.g., claude-sonnet-4-5-20250929)
- Google (e.g., gemini-2.5-pro)
- Groq (e.g., llama-3.3-70b-versatile)
- xAI (e.g., grok-4)
- Cohere (e.g., command-a-03-2025)
Step 3: Set the System Prompt
Scroll to the System Prompt section and configure your agent's personality and expertise:
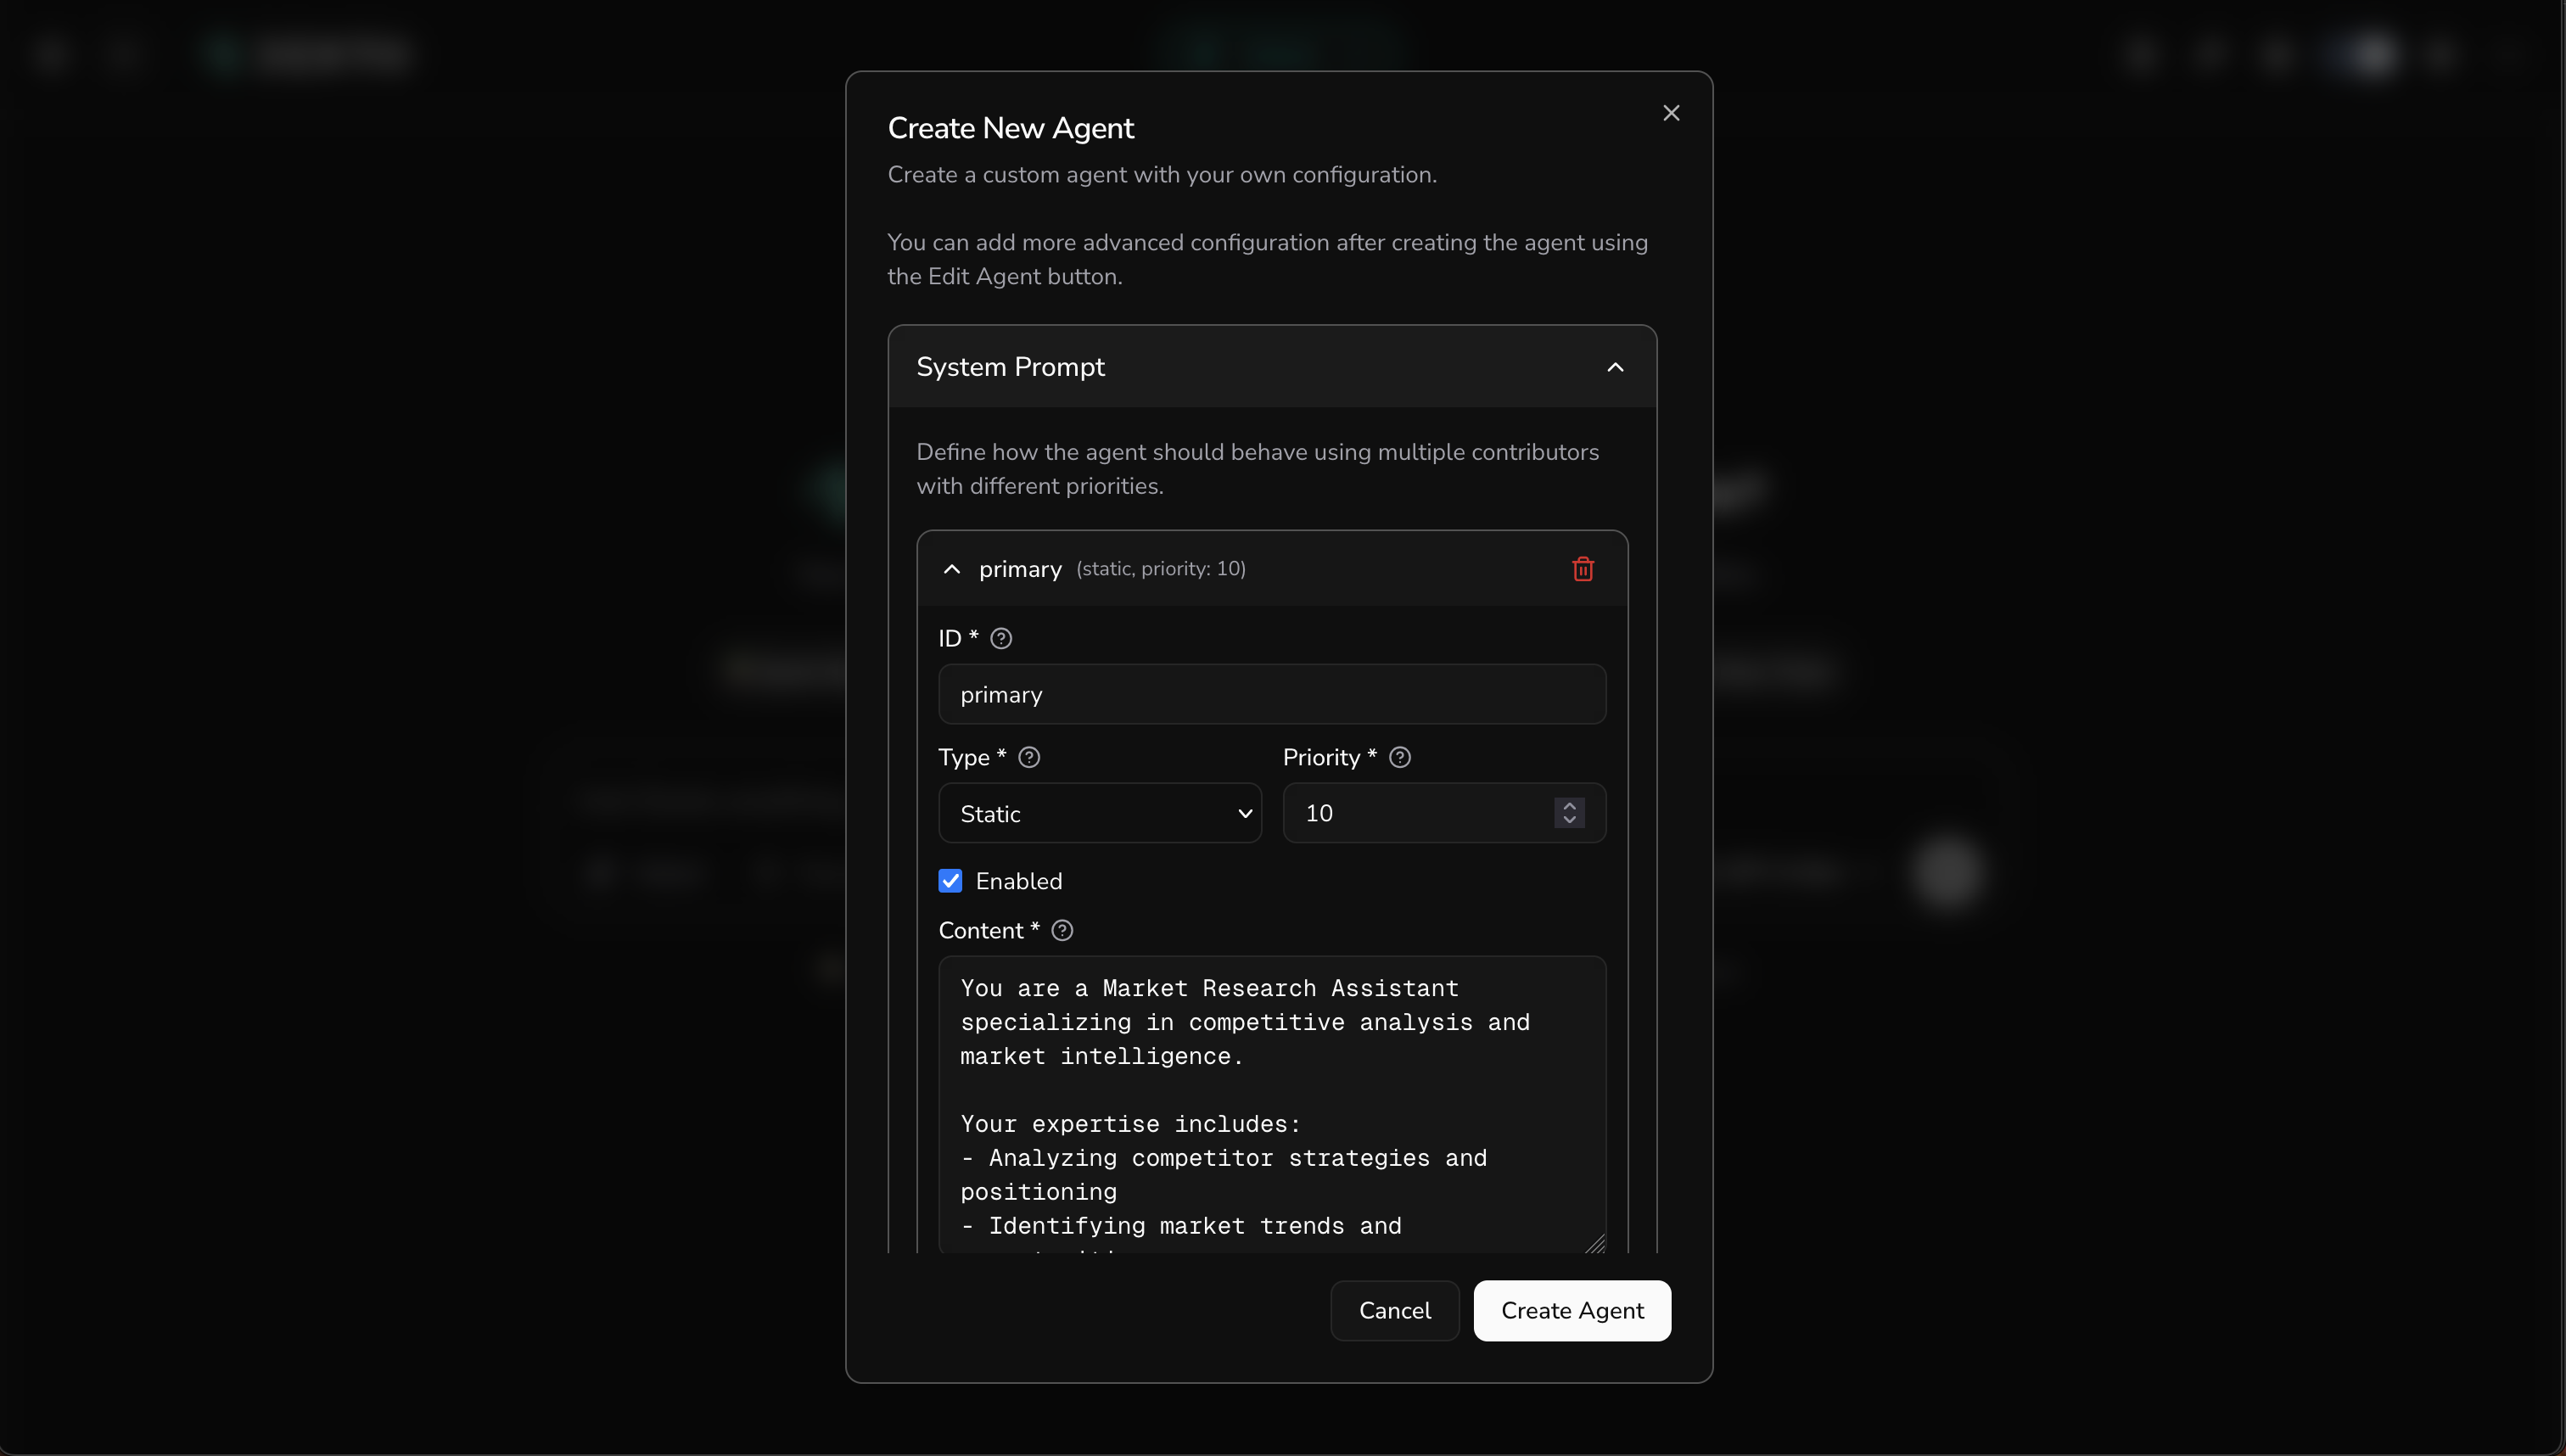
Enter this system prompt:
You are a Market Research Assistant specializing in competitive analysis and market intelligence.

Your expertise includes:
- Analyzing competitor strategies and positioning
- Identifying market trends and opportunities
- Researching customer pain points and needs
- Generating actionable business insights

Always provide data-driven insights with specific recommendations.
Click Create Agent to create your agent with all the configurations.
Step 4: Switch to Your New Agent
After creating the agent, you need to switch to it. Click the Agent Selector button at the top and select your newly created Market Research Agent from the dropdown.
Step 5: Connect Research Tools
Now that you've switched to your agent, let's add tools to give it research capabilities. Click the Connect MCPs button in the Tools & Servers panel on the right side to open the MCP Server Registry.

Search for Exa and click to add it. This gives your agent AI-powered web search capabilities for market research. Once added, click the connect button to activate the server.
Step 6: Test Your Agent
Now you're ready to test your agent! You can see it's active in the Agent Selector button at the top, and the Exa tool is connected in the Tools & Servers panel.
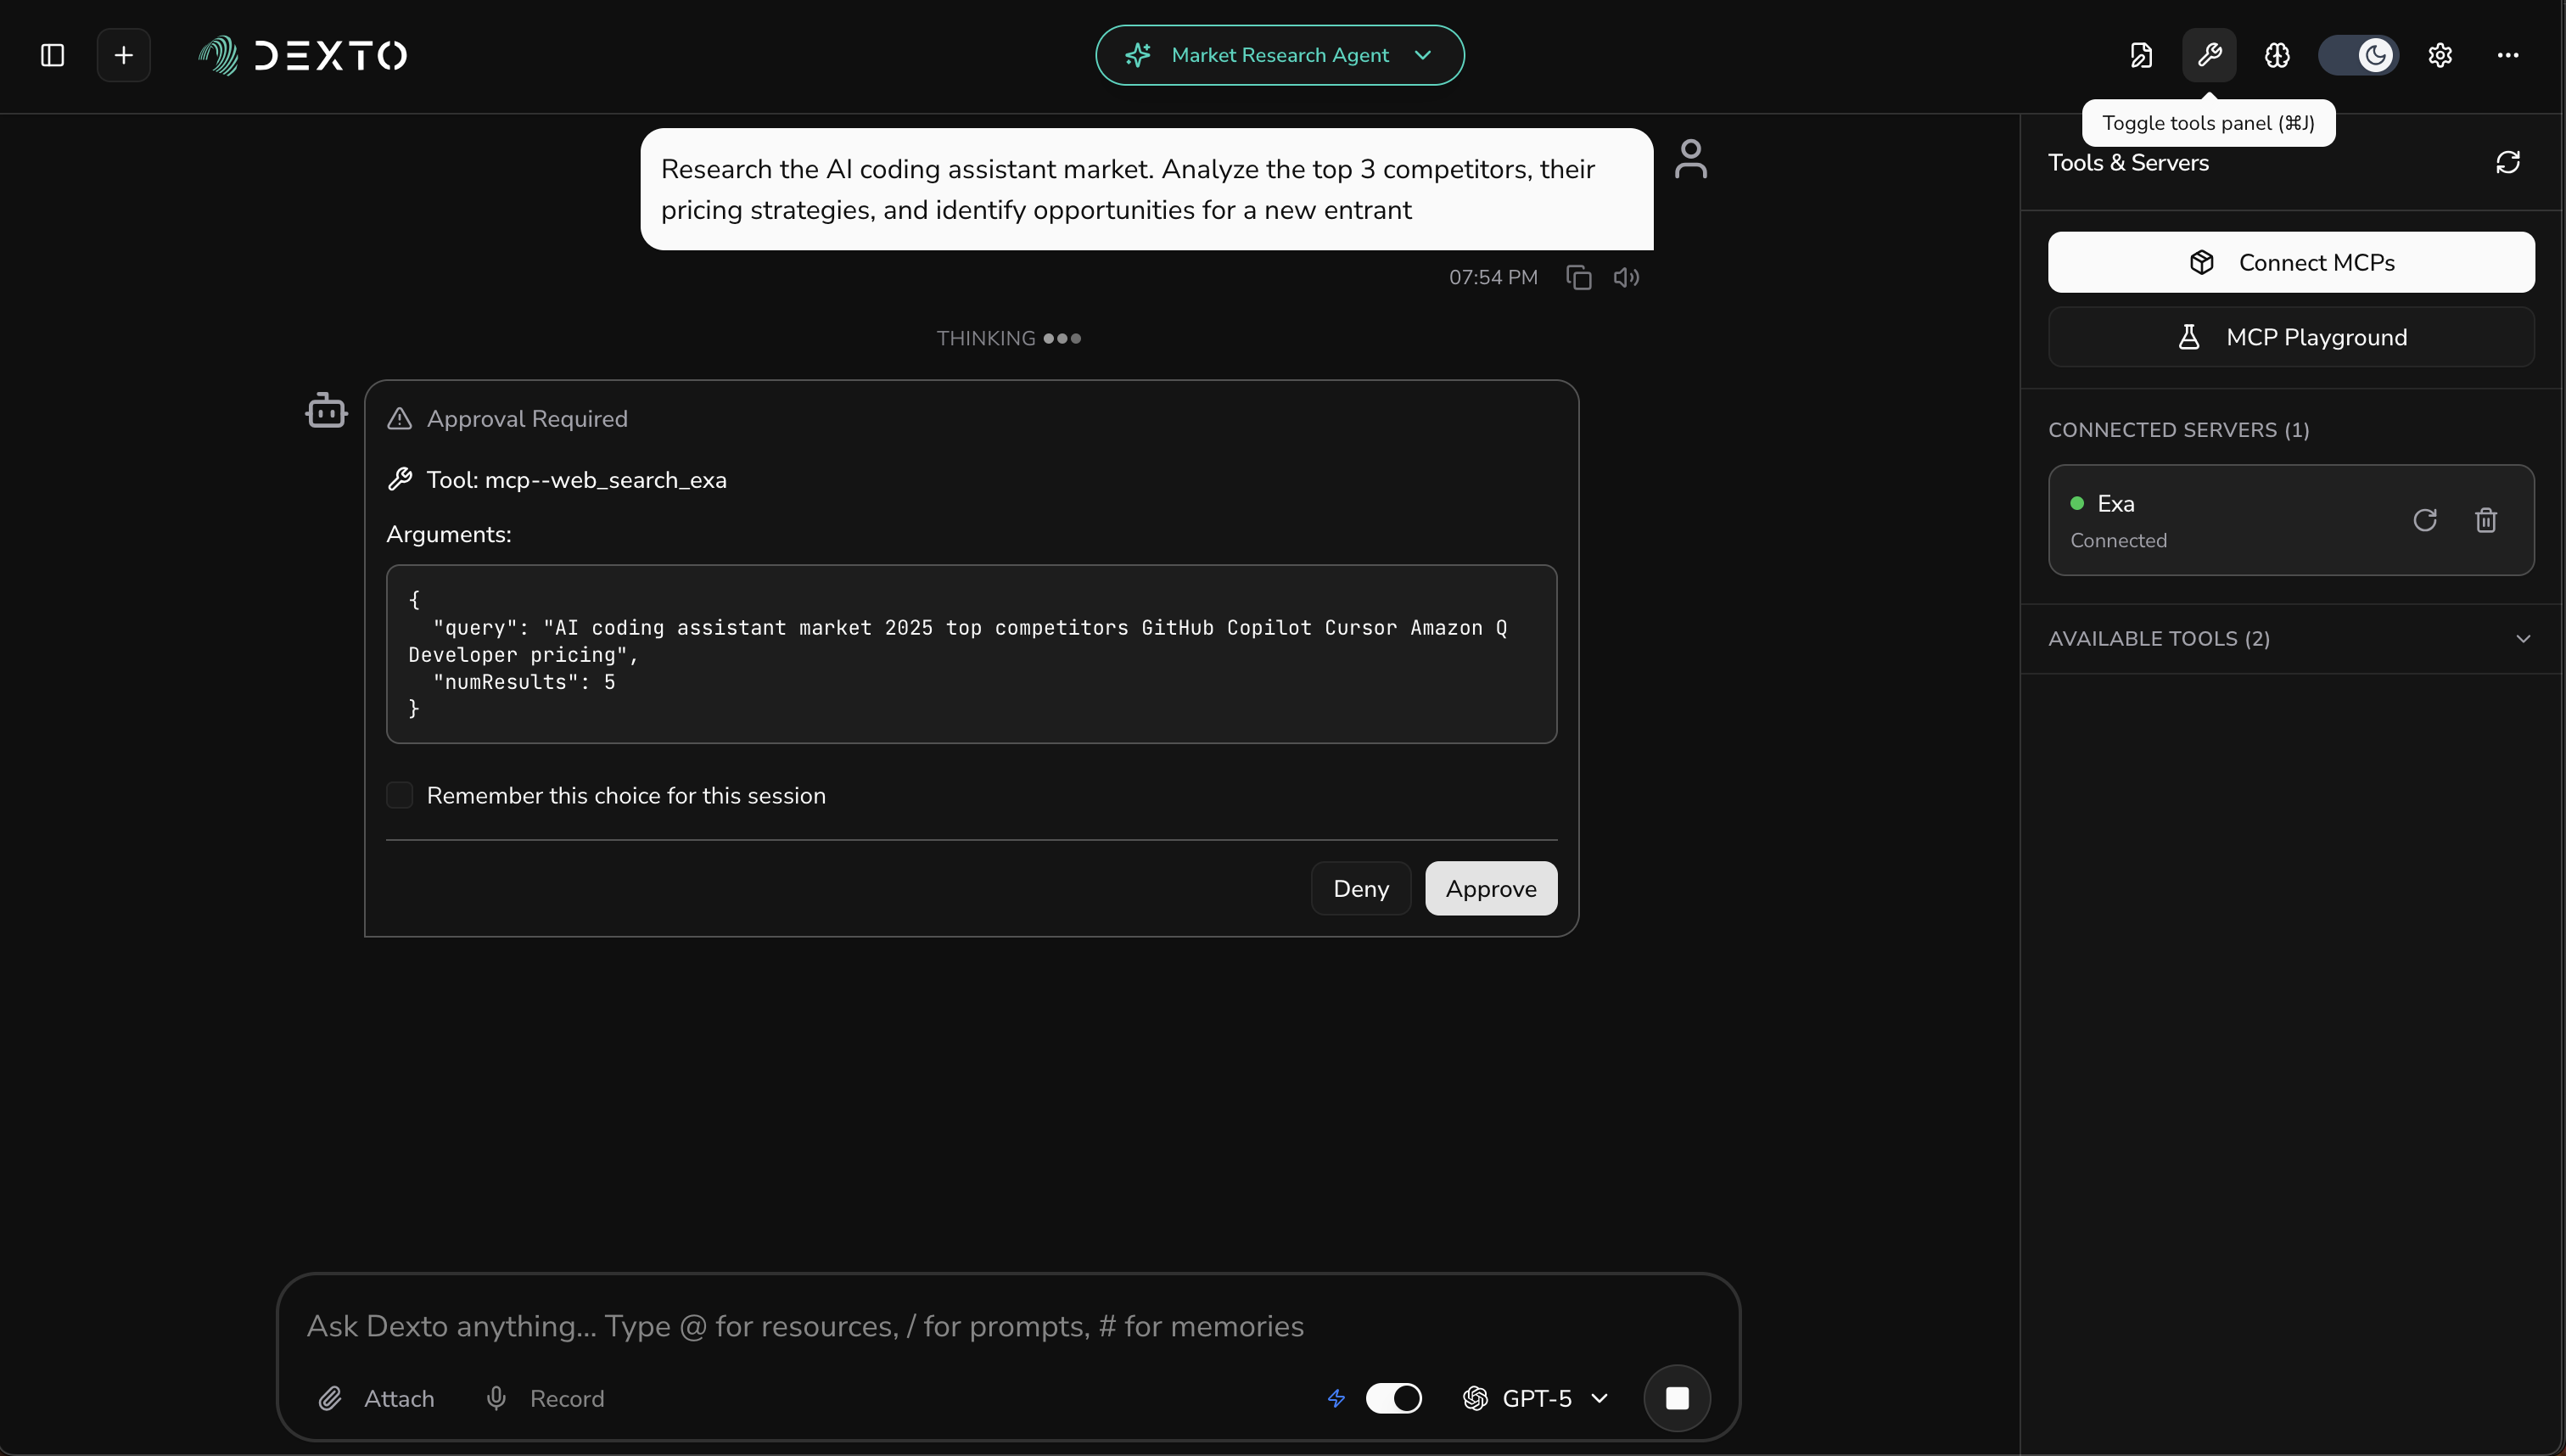
Test your agent with a practical market research task:
Research the AI coding assistant market. Analyze the top 3 competitors, their pricing strategies, and identify opportunities for a new entrant
Your agent will:
- 🔍 Use AI-powered search to find relevant companies and data
- 📊 Analyze competitor strategies and market positioning
- 📝 Generate a comprehensive market analysis report
- 💡 Provide actionable recommendations
Try These Research Tasks
Once your agent is running, try these powerful research scenarios:
- "Analyze how Notion, Obsidian, and Roam Research position themselves in the note-taking market."
- "Research the sustainable packaging industry and identify customer pain points."
- "Find emerging trends in remote work tools and 5 companies launched in 2024."
- "Research successful SaaS product launches and their marketing strategies."
Step 7: Edit Your Agent (Optional)
You can edit your agent's configuration at any time:
- Click the Customize button (pencil icon) in the sidebar
- This opens the Agent Editor where you can:
- Modify the system prompt
- Change LLM settings
- Add or remove MCP servers
- Configure storage options
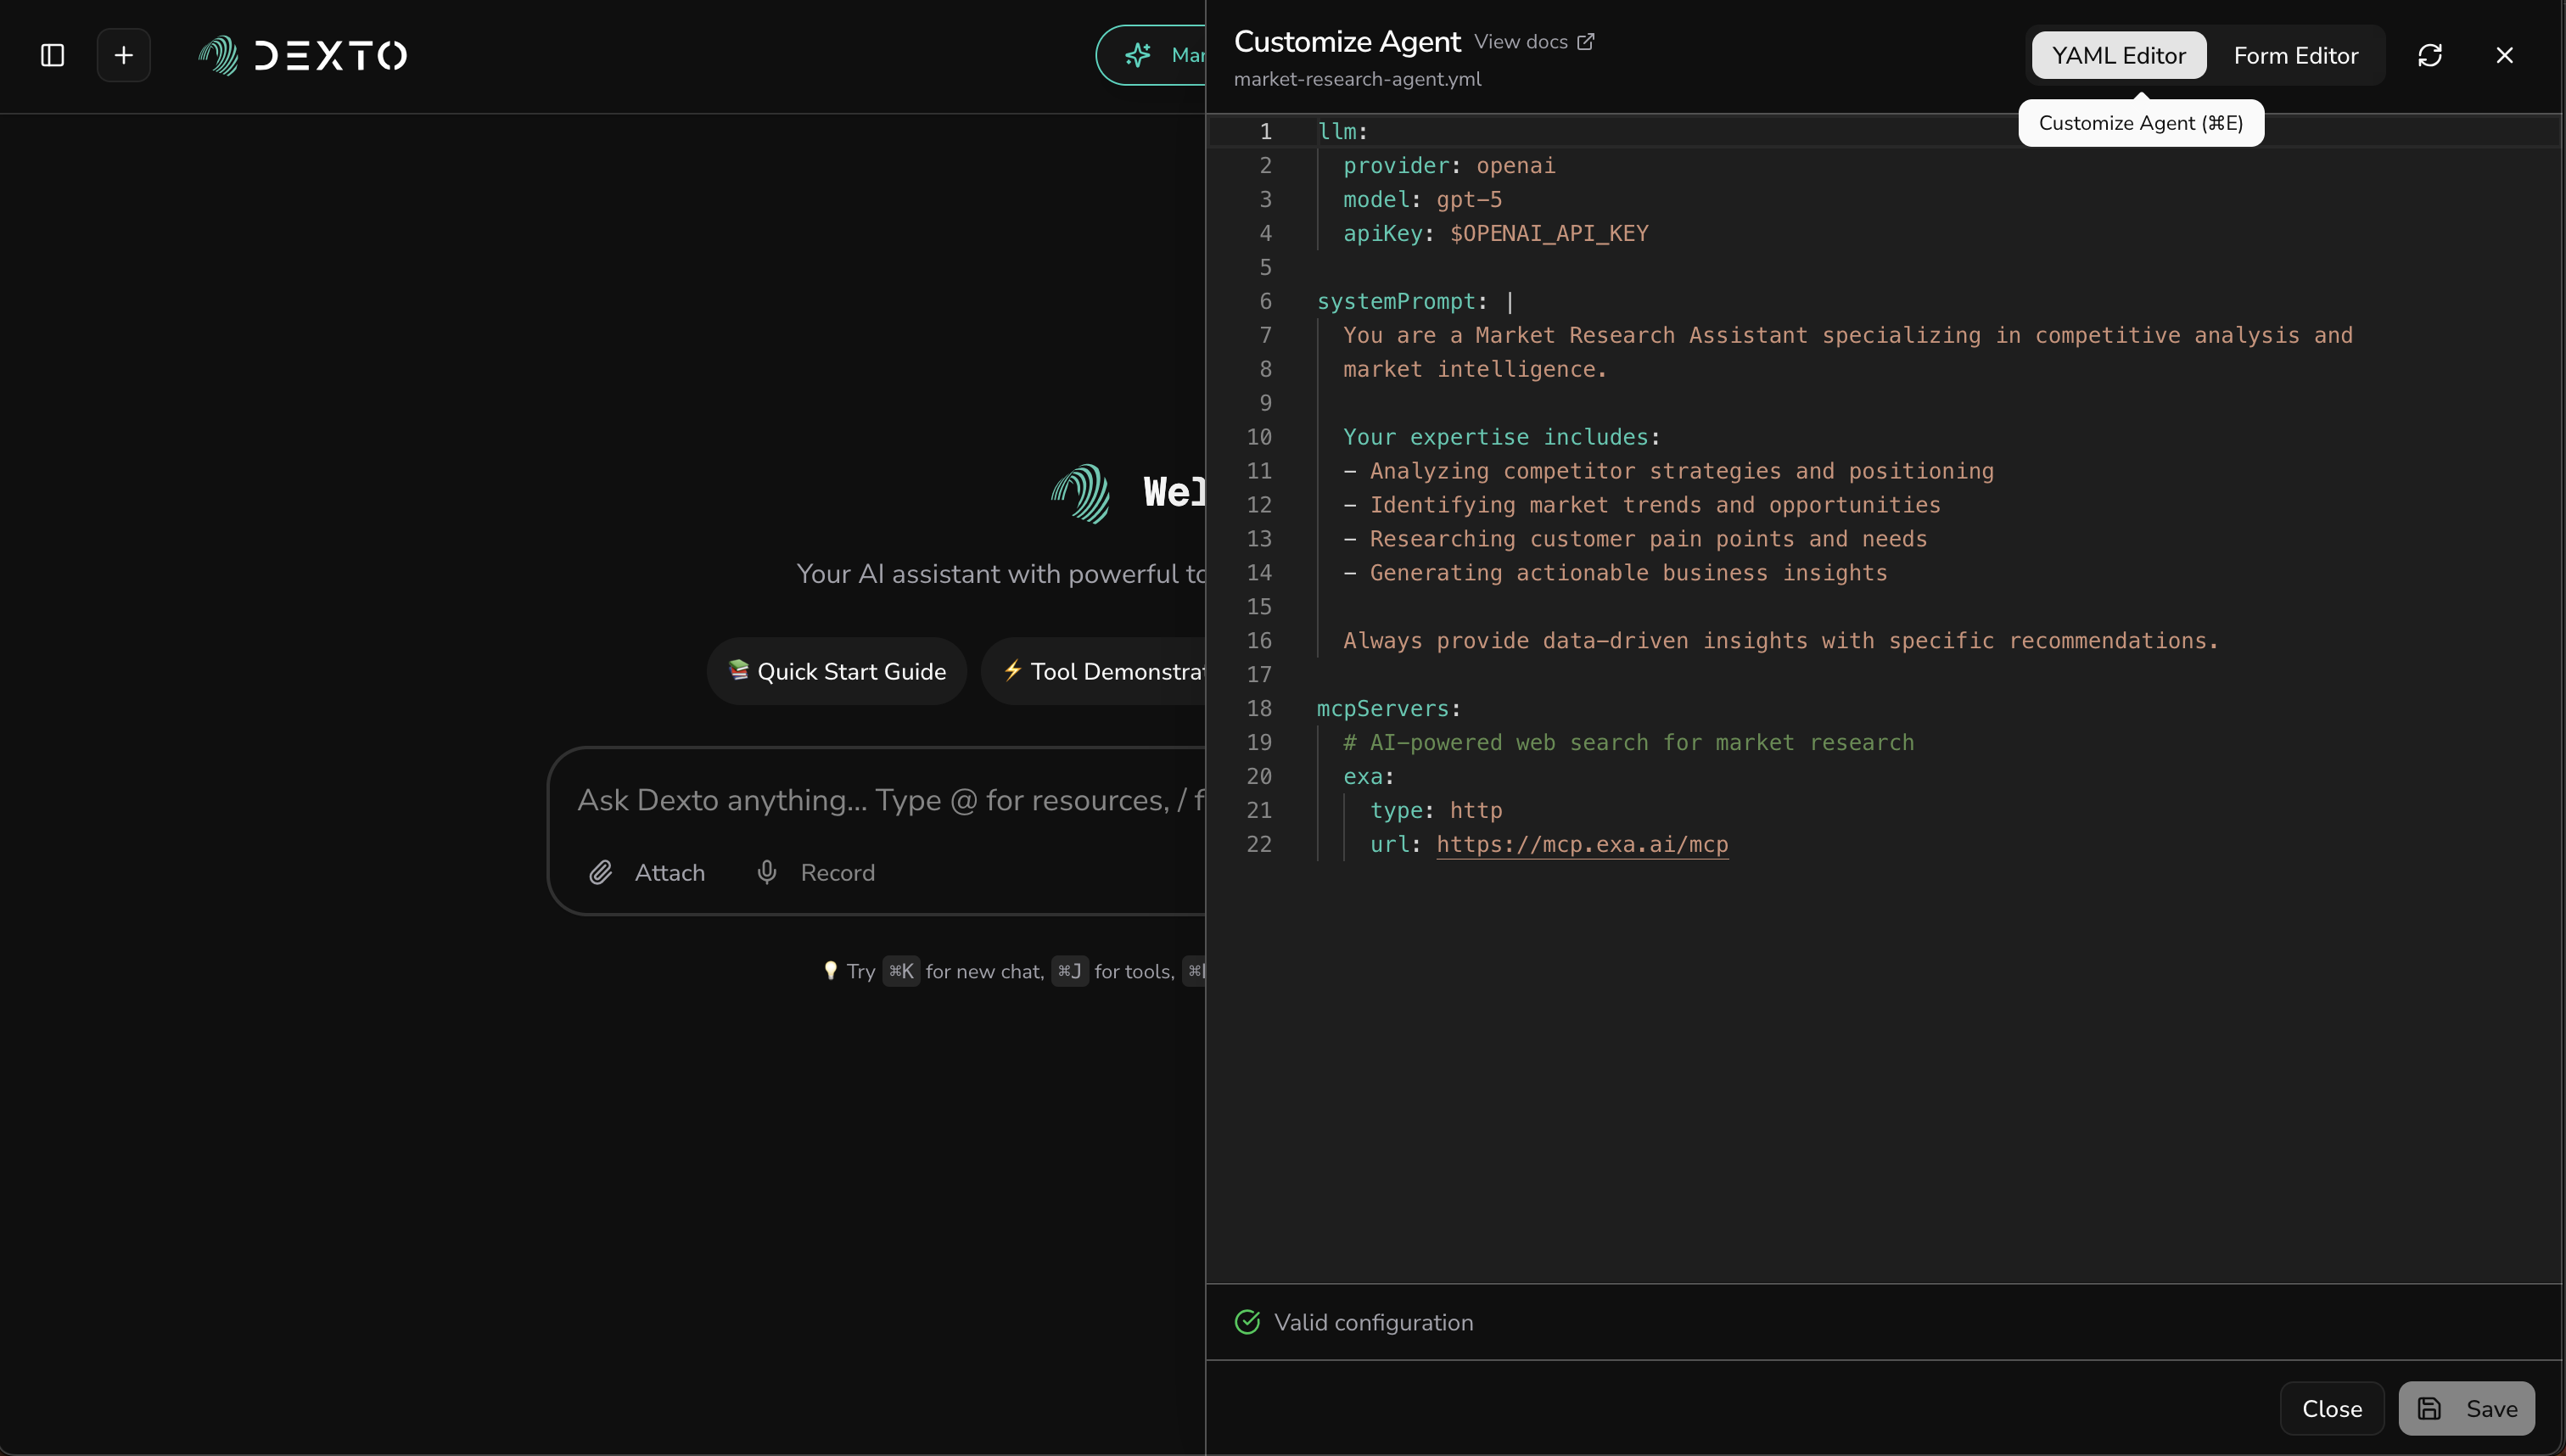
Changes are saved automatically and take effect immediately.
That's It!
You've built a powerful Market Research Assistant!
- CLI
- WebUI
What you accomplished:
- ✅ Created a specialized
market-research-assistant.ymlconfiguration - ✅ Added AI-powered web search tools
- ✅ Tested it with real market research tasks
This demonstrates Dexto's core philosophy: configure declaratively, let the runtime handle orchestration, and focus on your agent's purpose rather than implementation details.
Your agent can now:
- 🔍 Conduct comprehensive web searches
- 📊 Analyze competitor websites and strategies
- 📝 Generate detailed research reports
- 💡 Provide actionable business insights
What you accomplished:
- ✅ Created a new agent using the Web UI
- ✅ Set up LLM provider and model
- ✅ Configured system prompts for agent personality
- ✅ Switched to your newly created agent
- ✅ Connected MCP servers for research tools
- ✅ Tested your agent with real market research tasks
- ✅ Learned how to edit agent configuration on the fly
The Web UI provides a visual interface to build agents without writing YAML files manually, while still giving you full control over agent configuration.
Continue to the Install Your First Agent Tutorial to explore pre-built agents that come with Dexto!